

26 Mar Helmet Decal Installation Instructions
Recently purchased a helmet decal and are lost on how to use it? Look no further, we’ve got your back. Here are application instructions and how to preserve your decal.
Materials
- Decals
- Bowl of room temperature water
- Tweezers
- Scissors
- Helmet
- Decal set – found at most craft stores (Also available on Amazon)
- Wiping cloth
- Spray Lacquer-found at most craft stores (Also available on Amazon)
Decal Application
Before applying it is advised to keep decals at room temperature and low humidity for at least 24 hours.
Important Note:
It is important that you apply the decals to the correct side of the helmet for historical accuracy. Here’s a guide to help:
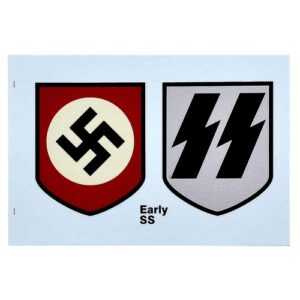
- SS helmets are the opposite of Heer “Army” and Luftwaffe.
- The SS decal goes on the ‘right ‘ side of the helmet as you are wearing it.
- The SS had it’s own party shield that would go on the left as you wear it.
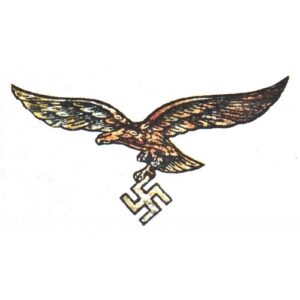
- The Luftwaffe and Heer “Army” decal would be applied on the left as you wear it.
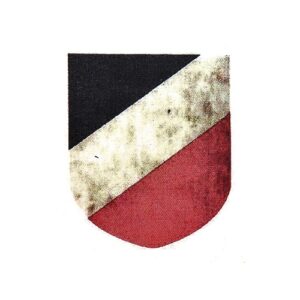
- The Luftwaffe and Heer use the same 3 tri-color shield that would be on the right as you wear it.
Step 1: Cut off decal from sheet. Remove all white background.
Step 2: Wipe the areas you will apply the decals with your cloth to remove any light grease from handling the helmet. Be sure to clean thoroughly to ensure the decal will not lift later on.
Step 3: Dip the decal in warm to hot water for about 30 seconds.
Step 4: Apply the Decal Set to the place you will apply the decal- Most come with a brush in the cap. Smaller bottles do not, however you can use a small paint brush to dip in and apply. Apply liberally.
Step 5: Using a pair of tweezers, gently remove the decal from the water. Using your finger and thumb, slide the decal upwards so it slides up the backing paper just a bit.
Step 6: Apply the exposed top part of the decal on the helmet while holding the paper part at the bottom with the tweezers.
Step 7: Slide the whole decal on with your left thumb while your right hand holds the paper part of the decal. The decal should now be on the helmet with you holding the backing paper in your tweezers. Throw the backing paper away.
Step 8: With the decal now on the helmet, you can position the decal correctly using your thumb. It should be centered and just below the air hole about 1/4″ below the hole. This will be close to WWII regulation.
Step 9: Once positioned take your cloth and press it against the decal to absorb any fluid. If you jostled it out of place you can still re-position. If it looks too dry to move re-apply some more of the Decal Set.
Step 10: Look for a ripples or air bubbles. Work these out with your thumb gently. Occasionally an edge will stick up, simply hold your thumb over it and it will attach.
Step 11: Let dry for 24 hours.
Step 12: Spray with a Matte Krylon (or similar) spray. This can be found at most hardware stores, Home Depot, Walmart or Amazon.
Step 13 : Follow conservation steps below.
Conserving your Decal
To protect decals against scratches and other damage, complete these steps after application. There are two options of conservation for most decals. For metallic decals, only use Option A.
Option A: Fix the decal with spray lacquer. Use the lacquer for water transfer decals. Do not use hairspray.
Option B: Put the finished helmet into an oven pre-heated to bake at 345 degrees F for 15 minutes. Decals coincide with the surface of the helmet. Before bake-on remove all leather parts from helmet! WARNING: Check oven frequently during baking. In case of any problem, turn oven off immediately and remove helmet with protective gloves to avoid burns.
Note: Items like these are non-political material. Decals were made for collectors, re-enactors, helmet restoration or historical research purposes only. World War Supply® does not condone, encourage or promote Nazism of any kind. We express deep sincerity and empathy for those affected by Nazism during WWII.
Written By: Johanna